Link to Forum page here
by: Keedo420
This tutorial was requested by RPC a while back (before Christmas I think) and I said it would “be a few days” before I got around to it. Well here it is now… Let me know if you have any trouble following it. I do not consider myself great at explaining things but hopefully this will help any of you who have trouble doing 2d ship facings with Gimp. Also, if you have any suggestions for improving this tutorial, please feel free to let me know. I will eventually put this tutorial on the Transcendence wiki, but I am currently having trouble accessing my account there so I am placing it here for now.
2D Ship Facings Tutorial for GIMP I am assuming you already have an image prepared for facings. In other words, you already have a ship image either on a solid black background or with a transparent background and the image dimensions cropped to the edges of the ship.
1) Your first step should probably be to create a facings template so that you do not have to create a new one for every ship you do facings for. Creating a facings template will save you a lot of time. I have created a 40-facing template complete with guides to ease with centering each facing and attached it to this post. After loading the facings template, click on View and make sure that both “Snap To Guides” and “Snap To Canvas Edges” are both checked. Then click on Image→Scale Image and resize the Width of the image to whatever you anticipate the width of the facings will be (Height will adjust itself automatically). You can always resize the width later if need be. The guides will adjust themselves accordingly and remain centered.
2) Make sure the background color in the toolbox is set to black, then select File→New and set the Width AND Height to the same number. You will want this number to be slightly larger than the longest dimension of your ship image. I suggest at least 4 pixels larger to create a 2 pixel border, but you may need to make the border larger depending on your image. In my example, I am creating facings for a Kilrathi fighter called the Gratha. I have made the Gratha 16 pixels long (probably much smaller than the ship you will be working on), so I am setting the base facing size to 20. If your ship is small like mine, you may need to zoom in (see step 4). Once you have set the Height and Width, click on OK to create the new image. Now drag horizontal and vertical guides to the center of the image (in my example, 10). Even if you decide to resize the base image, the guides will remain centered.
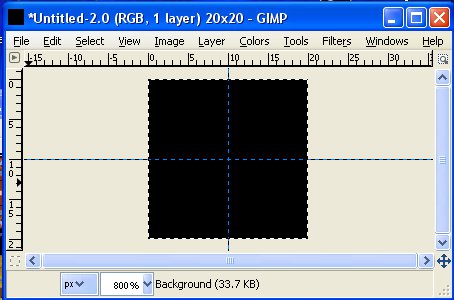
3) Now you are ready to create the base 0-degree facing (the front of the ship pointing straight up). I am assuming your ship image is already the size you want it to be in-game. If it is on a transparent background, simply Select→All and copy. Now switch to your base image and paste. If the pasted image does not have the front of the ship pointed straight up, click Layer→Transform and then use one of the Rotate options. Then, make sure you have the Move Tool selected and click anywhere in the base image to anchor the pasted ship. Alternately, you can click Layer→Anchor Layer. Once the pasted image is anchored, choose Select→All, then click Ctrl-X or Edit→Cut, and finally Ctrl-V or Edit→Paste. DO NOT anchor it this time. Now you are ready to begin the facings.
4) Go back to the Facings Template now. After making sure that the template width is the same as your base facing, look at the bottom-left corner of the window for the zoom setting. Click on the little down arrow and set it to whatever is large enough for you to accurately place the facings, but when you get to the 90, 180, and -90 degree facings you should have it set to 800% so that you can move the facing 1 pixel at a time (I will explain the need for this later).

After setting the zoom, stretch the window to the top and bottom of your screen. I advise against using full-screen windows since that will slow you down when switching between the facing template and base image. The base image window only needs to be larger enough to fit the whole image at whatever zoom setting you chose for it. Scroll to the top of the template and you are now ready to begin pasting facings onto it.
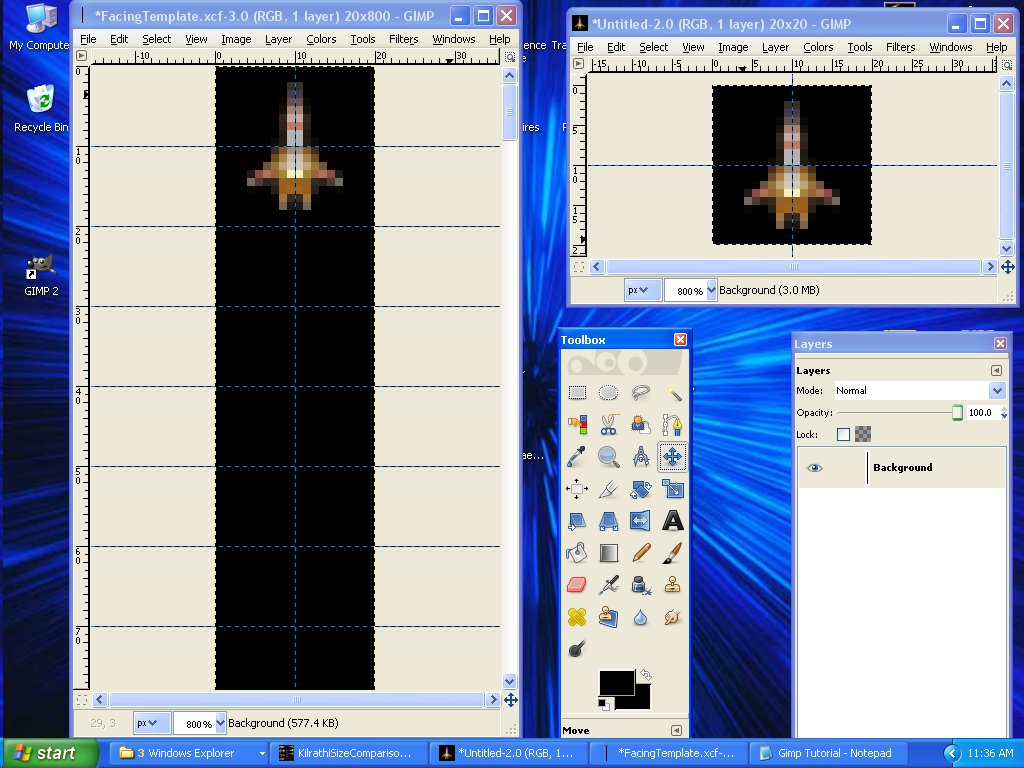
5) Since you Cut and pasted the base image already in its own window, the image is already in the clipboard and you can paste it into the facing template now. Once pasted, use the Move Tool to move the pasted facing to the top of the template. If you set the “Snap To Guides” and “Snap To Canvas Edges” as suggested in step 1, the pasted facing should automatically snap into place. Anchor the pasted facing and you can proceed to create the next facing. At this point you should have something that looks like this:
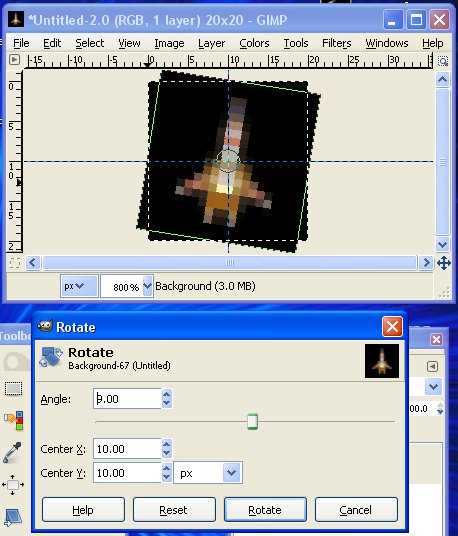
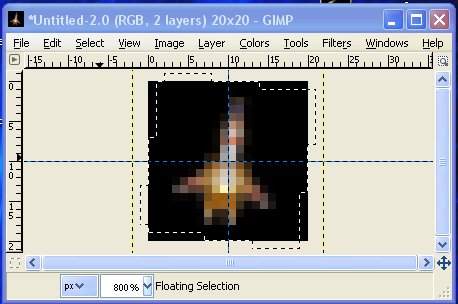
6) For 40-facings ships, each facing needs to be rotated by a factor of 9-degrees. You will start with the following rotations: 0, 9, 18, 27, 36, 45, 54, 63, 72, 81. OK, so you should now go back to the base image. Since you (hopefully) didn't anchor the base image, select Layer→Transform→Arbitrary Rotation. You've already done the 0-degree rotation, so set the angle for this one to 9. You can then hit the Enter key to see a “preview” of the rotation, but this is unneccessary and deceptive since the rotation will be offset by 1 pixel (as shown in the two pics below).
Instead, simply click on Rotate. Now switch to the Move Tool and anchor it by clicking anywhere on the image where the anchor symbol shows next to the cursor, or select Layer→Anchor Layer. Then use Ctrl-C or Edit→Copy; switch to the facings template; use Ctrl-V or Edit→Paste to paste the facing onto the template; use the Move Tool to position the pasted facing immediately below the previous facing, and anchor it. Now switch back to the base image, and hit Ctrl-Z or Edit→Undo twice and you are ready for the next facing. Repeat step 6 until you are ready to do the 90-degree facing, then proceed to step 7.
7) The 90, 180, and -90 degree facings are trickier, because Gimp's Arbitrary Rotation Tool is quirky. I will now show you how to avoid having Gimp mess up these three facings. In the base image, select Layer→Transform→Rotate 90* Clockwise, then Ctrl-C or Edit→Copy. Now Ctrl-Z once, then select Layer→Transform→Arbitrary Rotation, set the angle to 90*, and click Rotate. As you can now see, the Arbitrary Rotation tool does NOT rotate the image 90* exactly the same as when you chose Rotate 90* Clockwise, and it also screws up the image slightly. So, DO NOT copy it now, but leave it for reference. Since you already copied the 90* Clockwise rotation, switch back to the facing template, paste the facing, and use the Move Tool to place it below the 81* facing, using the messed up base image rotation as a reference on where to place it in relation to the guides. The two images below show (in the first image) what the preview of the arbitrary 90* rotation looks like and (in the second image) what you actually end up with after hitting rotate (on the right side) and how you should place the 90* facing (on the left side) before you anchor it to the template.


Once you've anchored the 90* facing to the template, switch back to the base image, hit Ctrl-Z once, then proceed to step 8.
8) Repeat step 6 for the following rotations: 99, 108, 117, 126, 135, 144, 153, 162, 171. When you are ready to do the 180* facing, proceed to step 9.
9) Like the 90* facing, the Arbitrary Rotation tool will mess up the 180* rotation (even more noticeably than the 90* rotation). Do this step just like step 7. The image below shows how you should place the facing before anchoring it to the template.
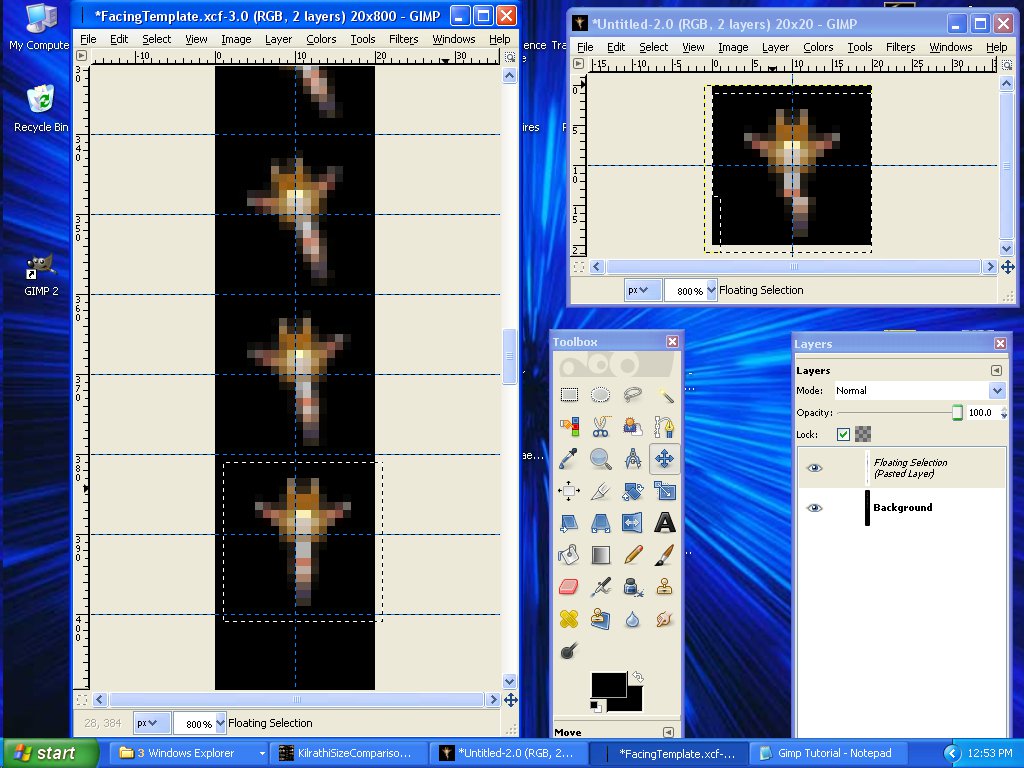
Once you've anchored the 180* facing to the template, switch back to the base image, hit Ctrl-Z once, then proceed to step 10.
10) Repeat step 6 for the following rotations: -171, -162, -153, -144, -135, -126, -117, -108, -99.
11) Like the 90* facing, the Arbitrary Rotation tool will mess up the -90* rotation. Do this step just like steps 7 & 9. The image below shows how you should place the facing before anchoring it to the template.
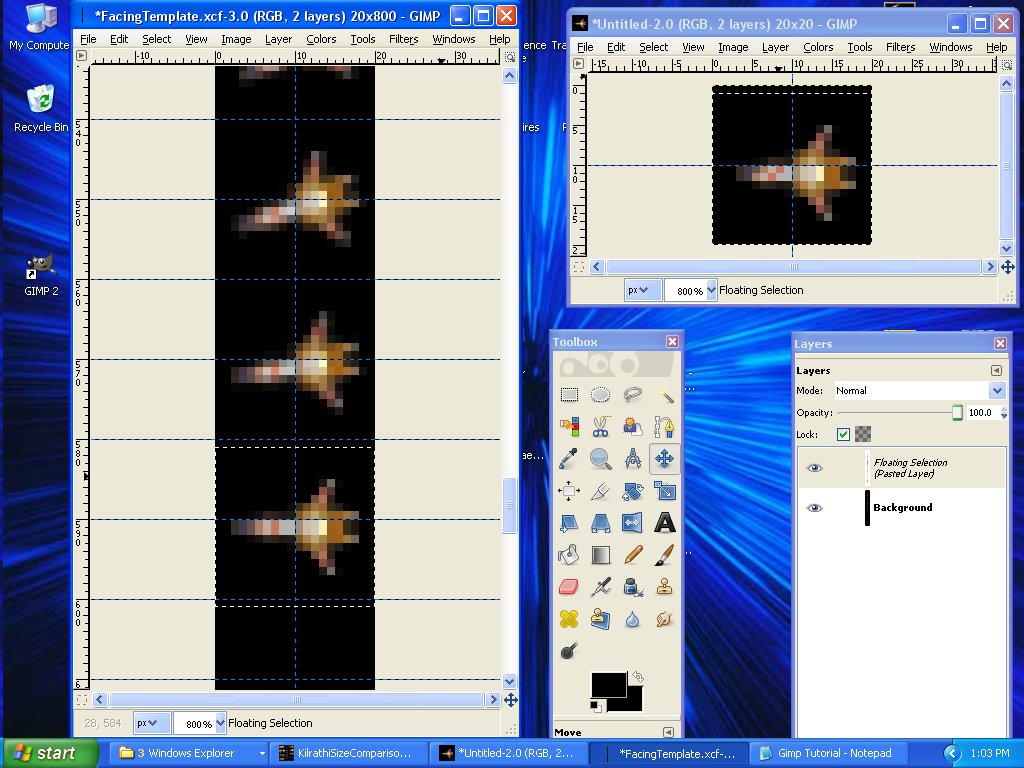
Once you've anchored the -90* facing to the template, switch back to the base image, hit Ctrl-Z once, then proceed to step 12.
12) Repeat step 6 for the following rotations: -81, -72, -63, -54, -45, -36, -27, -18, -9. After you've anchored the final facing, select File→Save As and save it as a .jpg with whatever filename you want (in my case, I named it (Kilrathi-Gratha.jpg). Be careful to avoid clicking File→Save at this point since you don't want to overwrite the facings template.
13) Once you've saved the facings as a .jpg, go to the Toolbox and switch the background color to white. Then choose the “Select By Color” tool. Depending on the size of your ship, you may have to alter the Threshold value up or down, but you can probably leave it at the default of 15. Now click anywhere in the black area of your facings image. If your ship has any black spots that are not supposed to be see-through, you may have to de-select those areas with the Free Select Tool at this point. In order to deselect only a specific spot with the Free Select Tool, hold down Ctrl before you click-and-drag the cursor. Once that is out of the way, choose Select→Invert and then hit the Delete key. Now choose File→Save As, add something like -M or Mask to the filename, and save it as a .bmp (in my case I named it Kilrathi-Gratha-M.bmp).
Final Notes: Depending on the size and color of your image, there may be some blurring/deresolution of certain parts of your ship (usually thin, dark pieces like weapon cannons) at the 45, 135, -45, and -135 degree angles. Keep in mind that some inconsistencies seen at 800% will not be noticeable at 100%, but you may need to fix them manually depending on how noticeable they are in-game.
facingtemplate.zip
